In 2014, I read Michael Pollan’s ‘Cook’ with great interest. In particular, the section about how to cook a pot roast slooooooooooowly was a revelation.
For years, I had to tried to mimic my mother’s mouth watering beef pot roast that I remember from childhood. The meat was succulent and fall to pieces off the fork. My best attempts rendered the meat flavourless and chewy and at worse, dry and unappetising. I followed recipes exactly to a tee but with mediocre results, so I assumed it was the meat I was using. I tried a variety of cuts, but that made little difference.
I had never considered that the recipes themselves were to blame. As Pollan explains: “...most recipes try to rush the process, promising to wrap things up and get the dish on the table in a couple of hours. These days, recipes are steeped in the general sense of panic about time, and so have tried to speed everything up…”
And then the revelation hit as I continued to read: “At [higher temperatures,] all but the fattiest meats will dry out and toughen…” Following the instructions outlined in the book (originally from Harold McGee), I put the uncovered pot in the oven starting at 100°C for 2 hours; after this I raised the oven temperature to 125°C for another 2 hours. Perfect result!
But here we are, several months on and I am reading a different book (Consider the Fork: A History of How We Cook and Eat), in which the Bee Wilson details how the modest cooking pot (cauldron) became the essential cooking device to medieval homes. Everything was cooked in it and “every race has its own variation on the one-pot dish, as well as variations on the specific pot that is used to make it...One-pot cookery is a cuisine of scarcity: scarce fuel, scarce utensils, scarce ingredients. Nothing is wasted.”
With a quick google-search, I came across a traditional Welsh Cawl recipe, made with lamb, that would have been cooked over the fire in one pot using the ingredients at hand as described in Wilson’s book. Immediately, I wanted to create my own version of Welsh Cawl.
Here were my immediate questions, given what I’ve learned about braising:
Would it be possible for the lamb to tenderise like that of a slow roast; if so, how?
Using some medieval cooking techniques (in my modern kitchen), is it possible to achieve the depth of flavours that I would expect in a stew?
How could I make it look (and taste) most appealing? After all, I was planning to serve this up to the family.
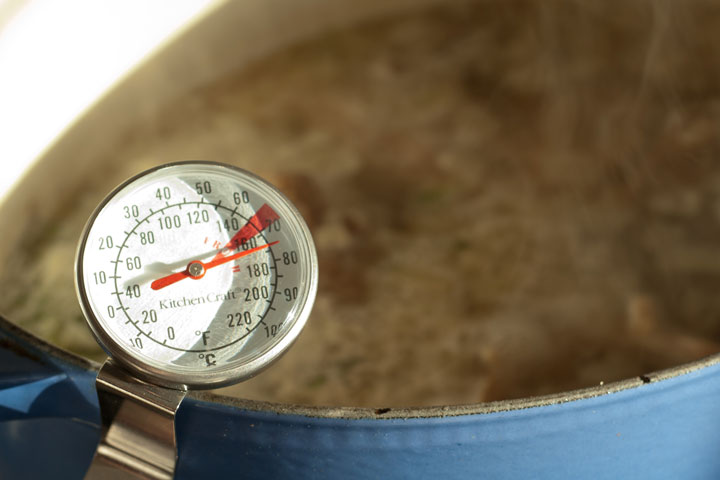
In answer to my first question, I came across an article by Bee Wilson on the science of meat stew, quoting Rose Prince: 'When a recipe says "simmer", it would be better to say keep well below boiling point at about 75-85°C.'
With that tip, I bought myself one of these:
Keeping the meat tender was my biggest concern; it’s the difference between a ‘go back for seconds’ meal and a disappointing meal. With, a clearer idea of how to cook the lamb on the hob, these are the other steps I decided to take and why:
Salt the lamb 24 hours beforehand with sea salt. Salting the lamb generously in advance would help the meat absorb the other flavours. Being a stovetop stew using only water (rather than stock) and vegetables, it needed all the help it could get to make it flavourful.
Brown the lamb. It appears that boiling meat without browning first was common in medieval recipes, but I did come across a couple medieval recipes online where it was browned in lard beforehand. Not only would it result in the cooked lamb looking brown rather than grey, but I figured that it might provide some depth of flavour to the broth.
Use a cast iron pot or heavy casserole dish to help with conduct the heat more evenly.
Keep the lid off or ajar to keep the water from boiling and therefore, avoid overcooking the meat.
Bearing all this information in mind, I knew that my newly adapted Welsh Cawl was going to need a great deal of attention (to avoid hot spots, for example) and a lot of time to make. Gone was the two-hour cooking time recommended in the original recipe.
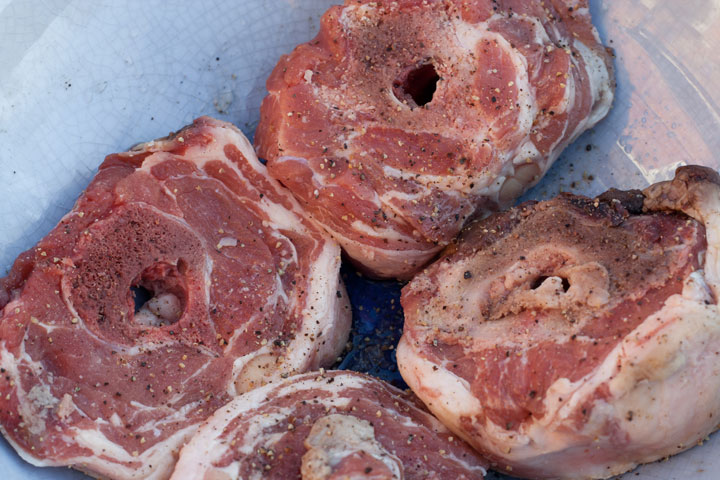
At the time of writing, I have four small portions of ‘stewing lamb ‘in my freezer from my most recent meat delivery. They have bones in them (I have no idea what cut of lamb they are) and while I don’t think it’s ideal for this particularly recipe, I am going to use what I have. After all, that it the very point of a Welsh Cawl - use what’s on hand.
Recipe
- 460g of uncut stewing lamb (i.e. neck) - season generously with salt and pepper at least 24 hours in advance
- 1 tbsp vegetable oil
- 75g pearl barley
- 1 small onion, roughly chopped
- 2-3 carrots (approx. 200 g), peeled and cut into small chunks
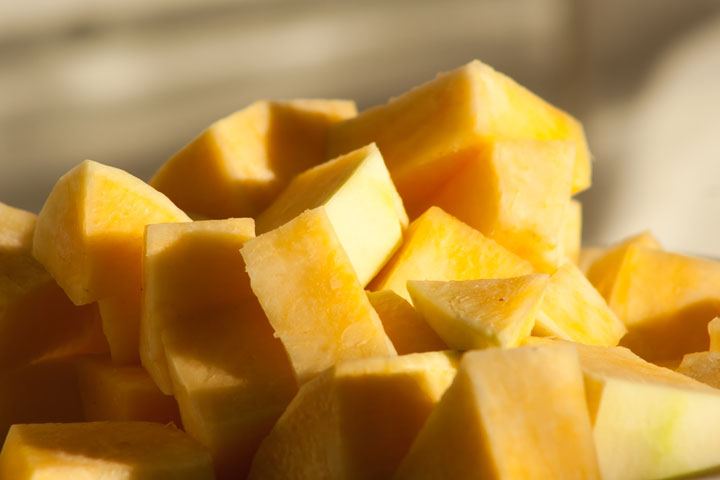
- ½ a swede (approx. 300 g), peeled and cut into small chunks
- 1 medium winter turnip (approx. 200 g), peeled and cut into small chunks
- 1 medium potato (approx. 300 g), peeled and cut into med-large chunks
- 1-2 leeks (approx. ) chopped into chunks, including the green end
- Small bundle thyme
- 1 bayleaf
- 1 sprig of rosemary
- salt and pepper
Cut the lamb into big chunks (the pieces will shrink in the cooking process, so don’t cut them too small).
In a large soup pot or crock pot lightly brown the meat on all sides in vegetable oil over a brisk heat. This will keep the meat from looking grey when it is cooked and provide some flavour to the broth. Transfer the lamb to a plate temporarily once it is browned.
Turn the heat down a little. Add the chopped onions and cook until they begin to caramelise around the edges, stirring frequently so that the onions don’t catch on the bottom of the pot.
Return the lamb to the pot and cover with water (approximately 1.5 ltr). Add the herbs and pearl barley.
Attach the thermometer to the side of the pot at least 1 inch into the liquid, but not touching the bottom of the pot. Slowly bring the liquid to 75-80°C. Cook at 80C for 1 hour uncovered; move the pot around occasionally to avoid hot spots and stir the liquid from time to time to help the heat circulate evenly.
After 1 hour, add the densest vegetables (carrots and swede). Some of the water will have evaporated, so feel free to add some more hot water to keep the meat and vegetables covered. Cook for another hour, monitoring the temperature closely; the water should remain below simmering point (80°C)
After a further 1 hour (two hours in total), add the turnips (and any other vegetables with medium density).
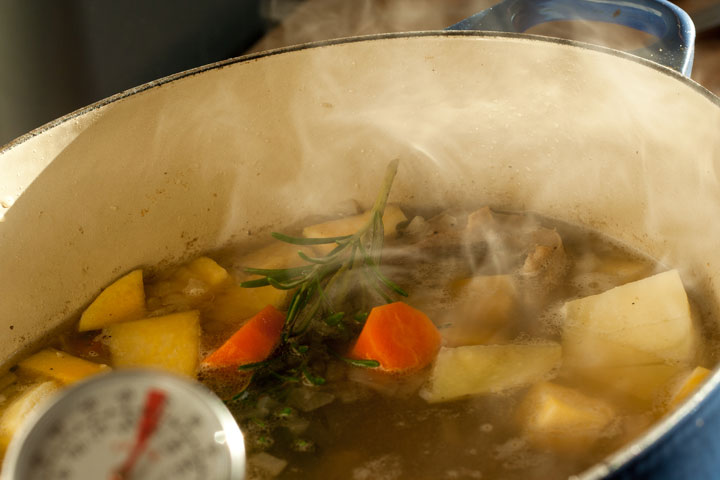
Allow another hour of slow cooking (3 hours in total). By this time, the broth has developed a depth of flavour from the herbs and vegetables. Season generously with salt and pepper at this point, if you haven’t done so already. Feel free to remove the rosemary (and other herbs) if it has started loosing it’s needles - though keeping it in shouldn’t affect the final result.
Note: When the initial vegetables can be pierced with a fork but still feel firm (indicating that they need more cooking), that is a good cue that cawl is nearly ready.
Finally, add the leeks (and any other softer vegetables) and cook for 30-45 minutes until all the vegetables are tender. The meat should still be red in the middle even after 3 ½ - 4 hours cooking, so long as it is kept below simmering.
To serve:
In my mind I instantly pictured having this traditional soup with some rustic soda bread; it was a great combination. The simple broth needs the addition of strong flavour, so try serving it with something other than a white loaf.
Results
The first thing to say about the Welsh Cawl is that is more of a lamb and vegetable soup than stew. Without flour (or other thickening agent), the water remains thin. It is a delicious, light broth.
I had prepared myself to be tied to the kitchen for at least 4 hours and was unsure how complicated it would be to maintain a cooking temperature of 75°C - 80°C For the first two hours, I did watch the thermometer closely, stirred the ingredients frequently to get an even temperature and turned the pot often to avoid hotspots.
I also topped up the water levels about 3 times during that period, to keep the ingredients covered. During the last hour and a half I decided to allow the broth to evaporate to help it develop a richness of flavour.
After two hours I had found a rhythm in the cooking process. I had learned how often I needed to turn the pot and stir the ingredients. For the remainder of cooking time, I would check the cawl every 15-20 minutes (If I make this again, I will feel more relaxed about the whole process from the start). Aside from having to check regularly to ensure the broth doesn’t simmer, I was surprised how easy the cawl was to make.
The recipe is very adaptable. The variety of changes I made to the original recipe is a case in point! The broth will take on the flavours of whatever vegetables are in season - or found in the fridge - and in whatever quantities are available. Similarly, the pearl barley was a very nice addition but not essential. The measurements listed above should be viewed as a guideline rather than a strict rule.
There are only a few definite ‘rules’ I would set for the next time:
Keep the temperature low! The meat was perfectly cooked and the water needed time to absorb all the flavours.
Include rosemary amongst the herbs. Like the vegetables, the herbs used can be varied, but I thought the sprig of rosemary made the biggest contribution to the overall flavour in the broth.
Be generous with the salt and pepper. There isn’t any premade stock in the cawl, so the water needs extra seasoning compared to other soup or stew recipes.